Customizing the tenting angle
Benefits of tenting
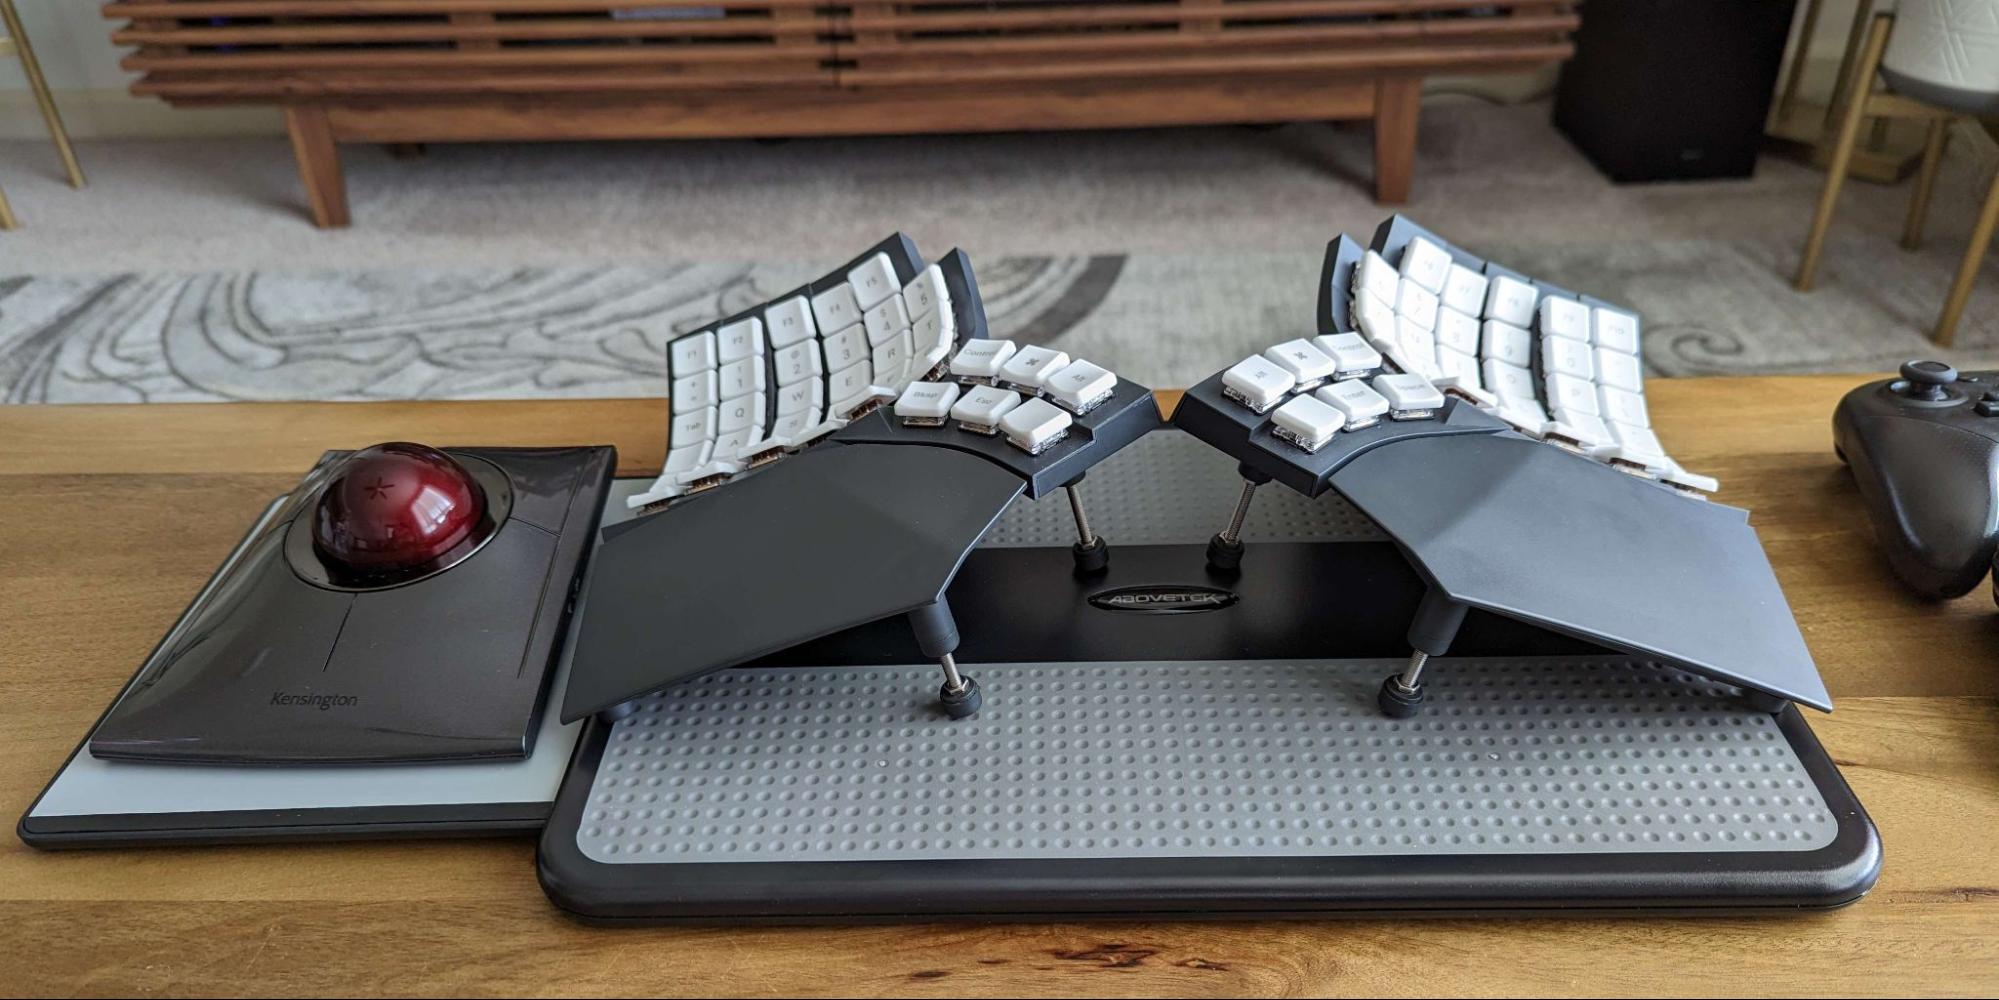
If you hold your palm flat on a desk surface and hold it there for a few minutes, you will feel tension on your forearms: this is called forearm pronation. If you rotate your wrists so that the thumb side is raised slightly into the air, you will likely find the position more comfortable. A keyboard like Glove80 that accommodates this rotated palm position is called tented (as the shape made by the palms is reminiscent of a tent). The keyboard’s tenting angle is the amount of rotation that the keyboard accommodates.
Glove80 has a default tenting angle which is comfortable for most people. However, we found that tenting is an area where the most comfortable configuration differs greatly between users.
To address this, we built a tenting system into Glove80: the legs of Glove80 can be extended to increase the tenting angle of the keyboard, allowing you to choose the precise degree of tenting that feels best for you.
How to adjust the tenting angle
Note
We recommend waiting until you have used Glove80 for a few days before you try customizing the tenting angle. Glove80 comes with a tenting angle that is comfortable for many people. It would be worthwhile to type on Glove80 for at least a few days to get a good sense of the ergonomics of Glove80 before adjusting the tenting angle.
Unlike other keyboards, Glove80 allows you to precisely tune the tenting angle so that you can find exactly the right angle for you.
Finding the most comfortable tenting angle is a journey of experimentation. Don’t worry if you don’t get it right the first time. Try what you think would work, test it out, and adjust accordingly.
For lower angle tenting adjustments
Material needed:
- Half-height M4 nuts, full-height M4 nuts and M4 spanner (included); or
- Silicone O-rings (included)
Note
Please see Tenting, tilting and custom mounting accessories for a visual guide to the included accessories.
Adjusting the tenting angle:
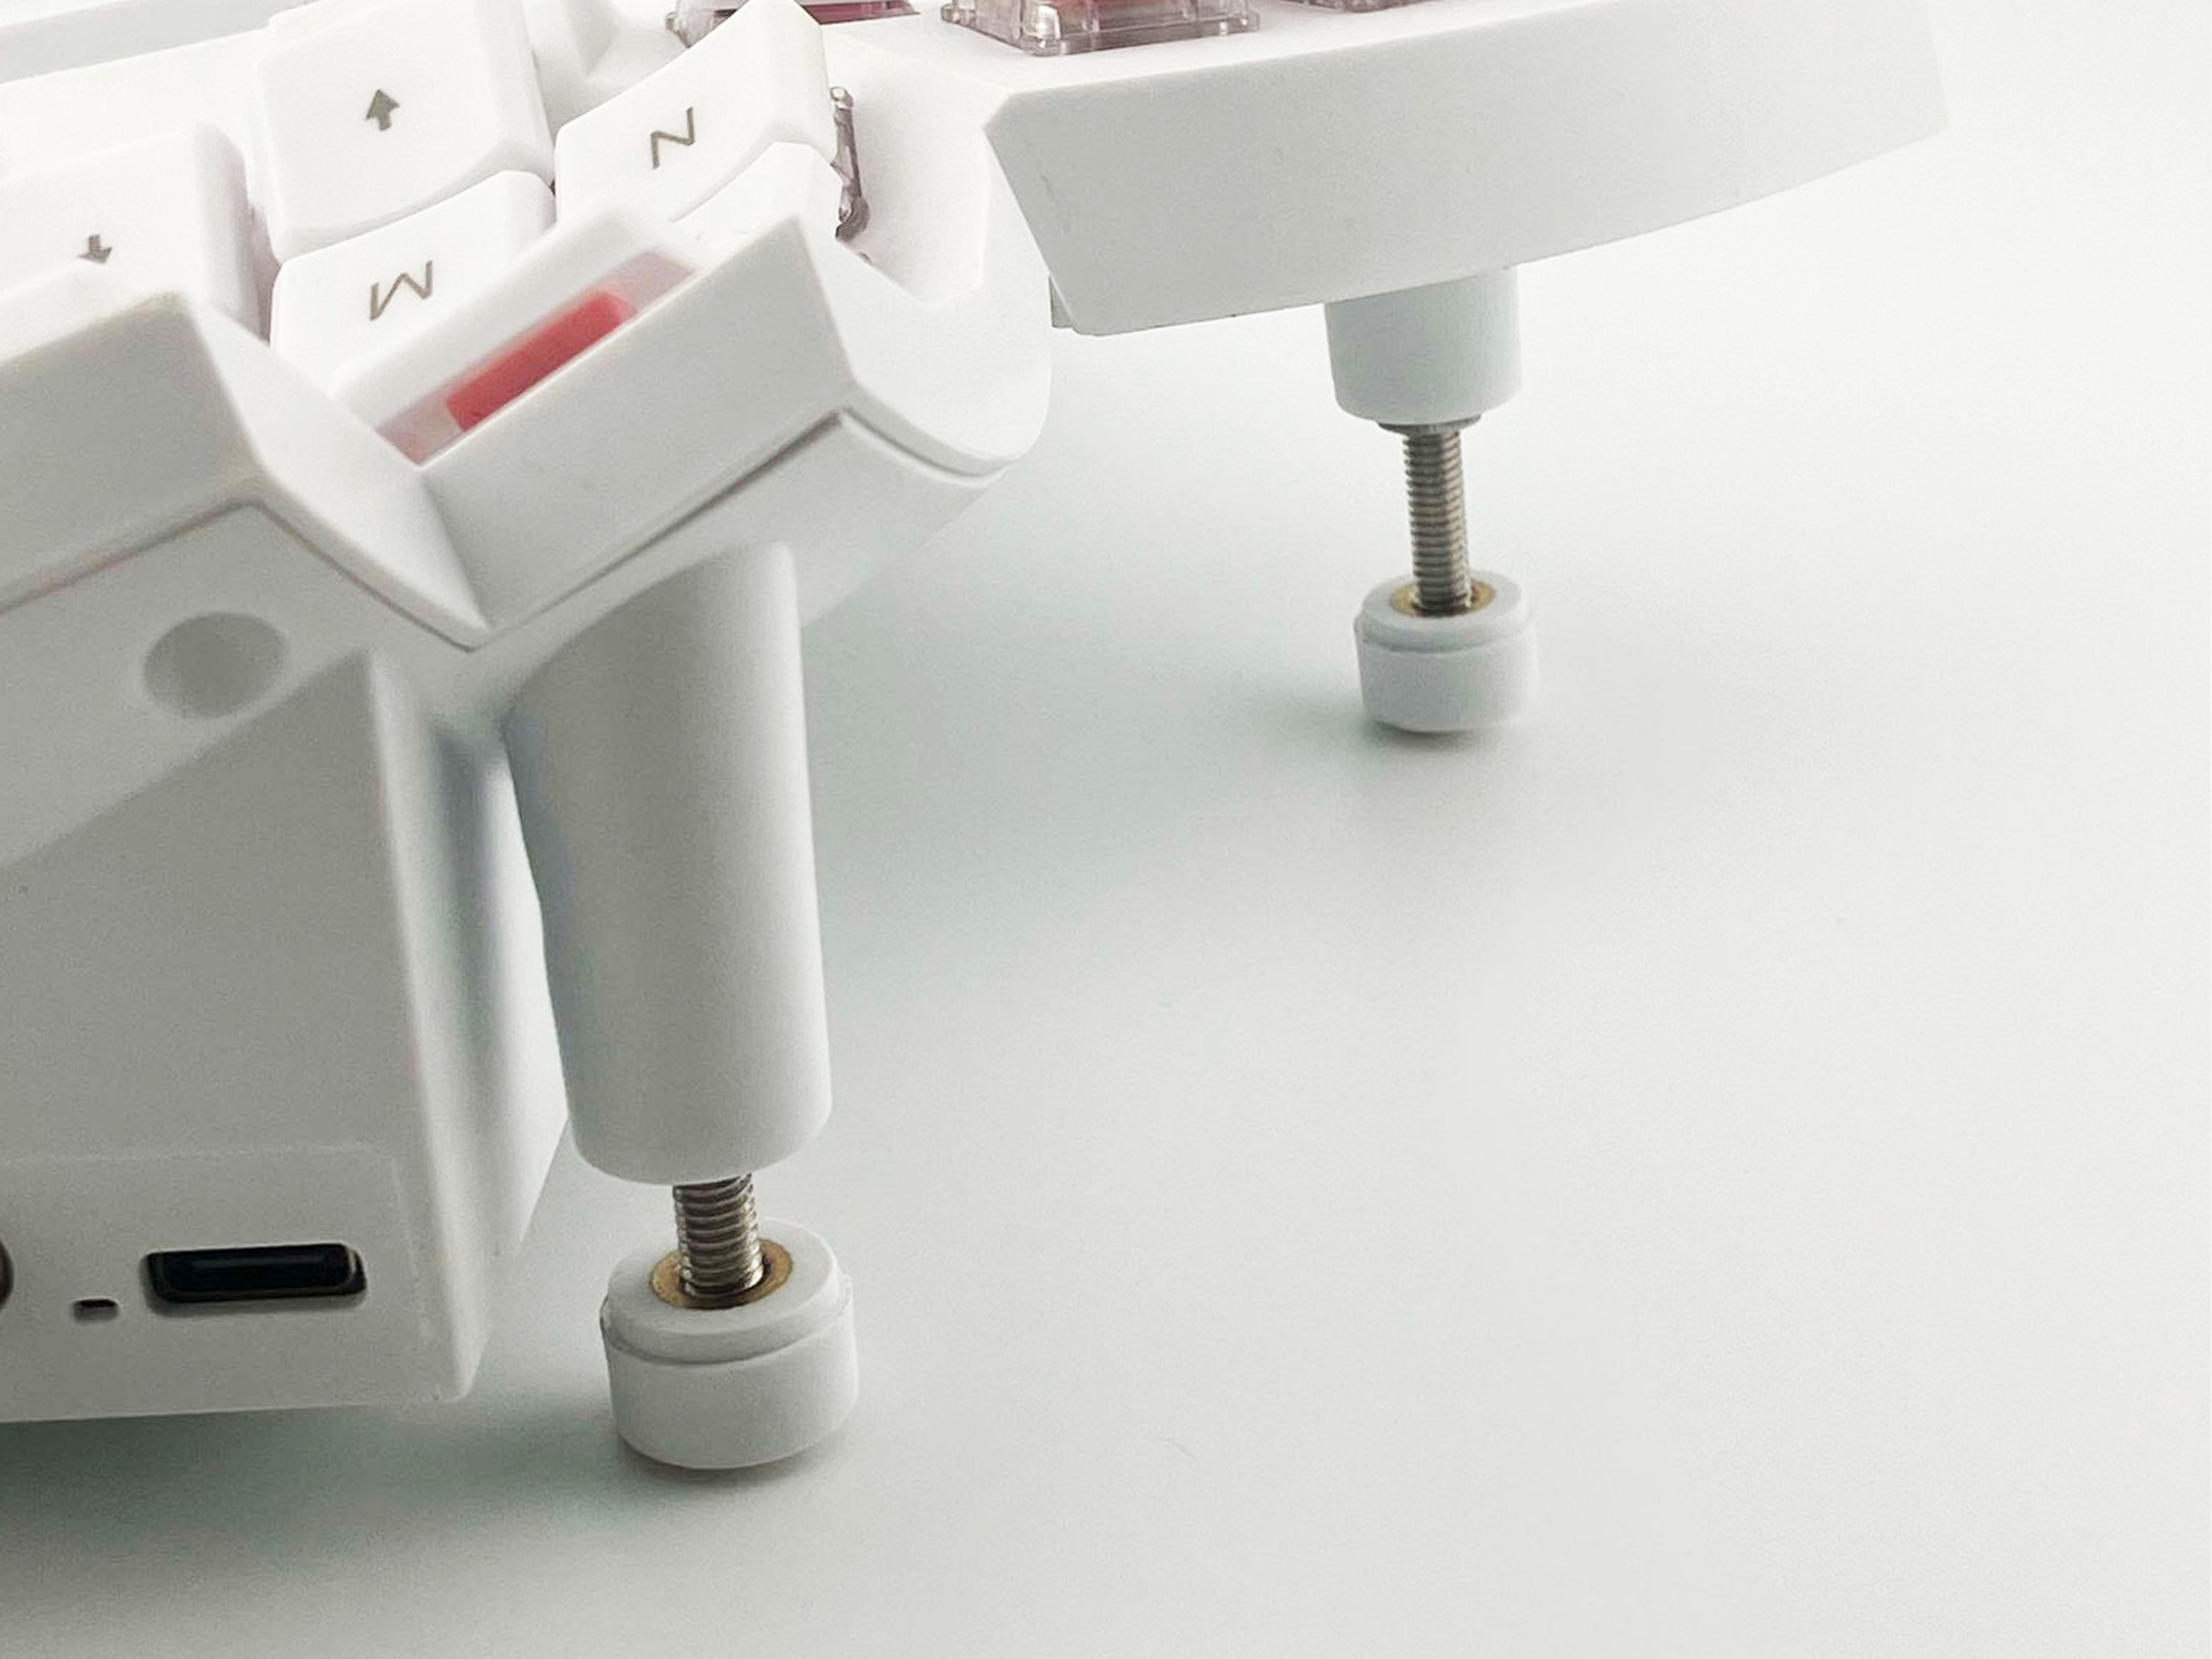
- Extend the feet of the inner (thumb cluster) side of Glove80 by rotating the feet counter-clockwise, until the tenting angle is comfortable for you. Start by extending just the thumb cluster foot to set your chosen tenting angle, then lower the other feet until all the feet are stable on the desk. Make adjustments to each leg as necessary.
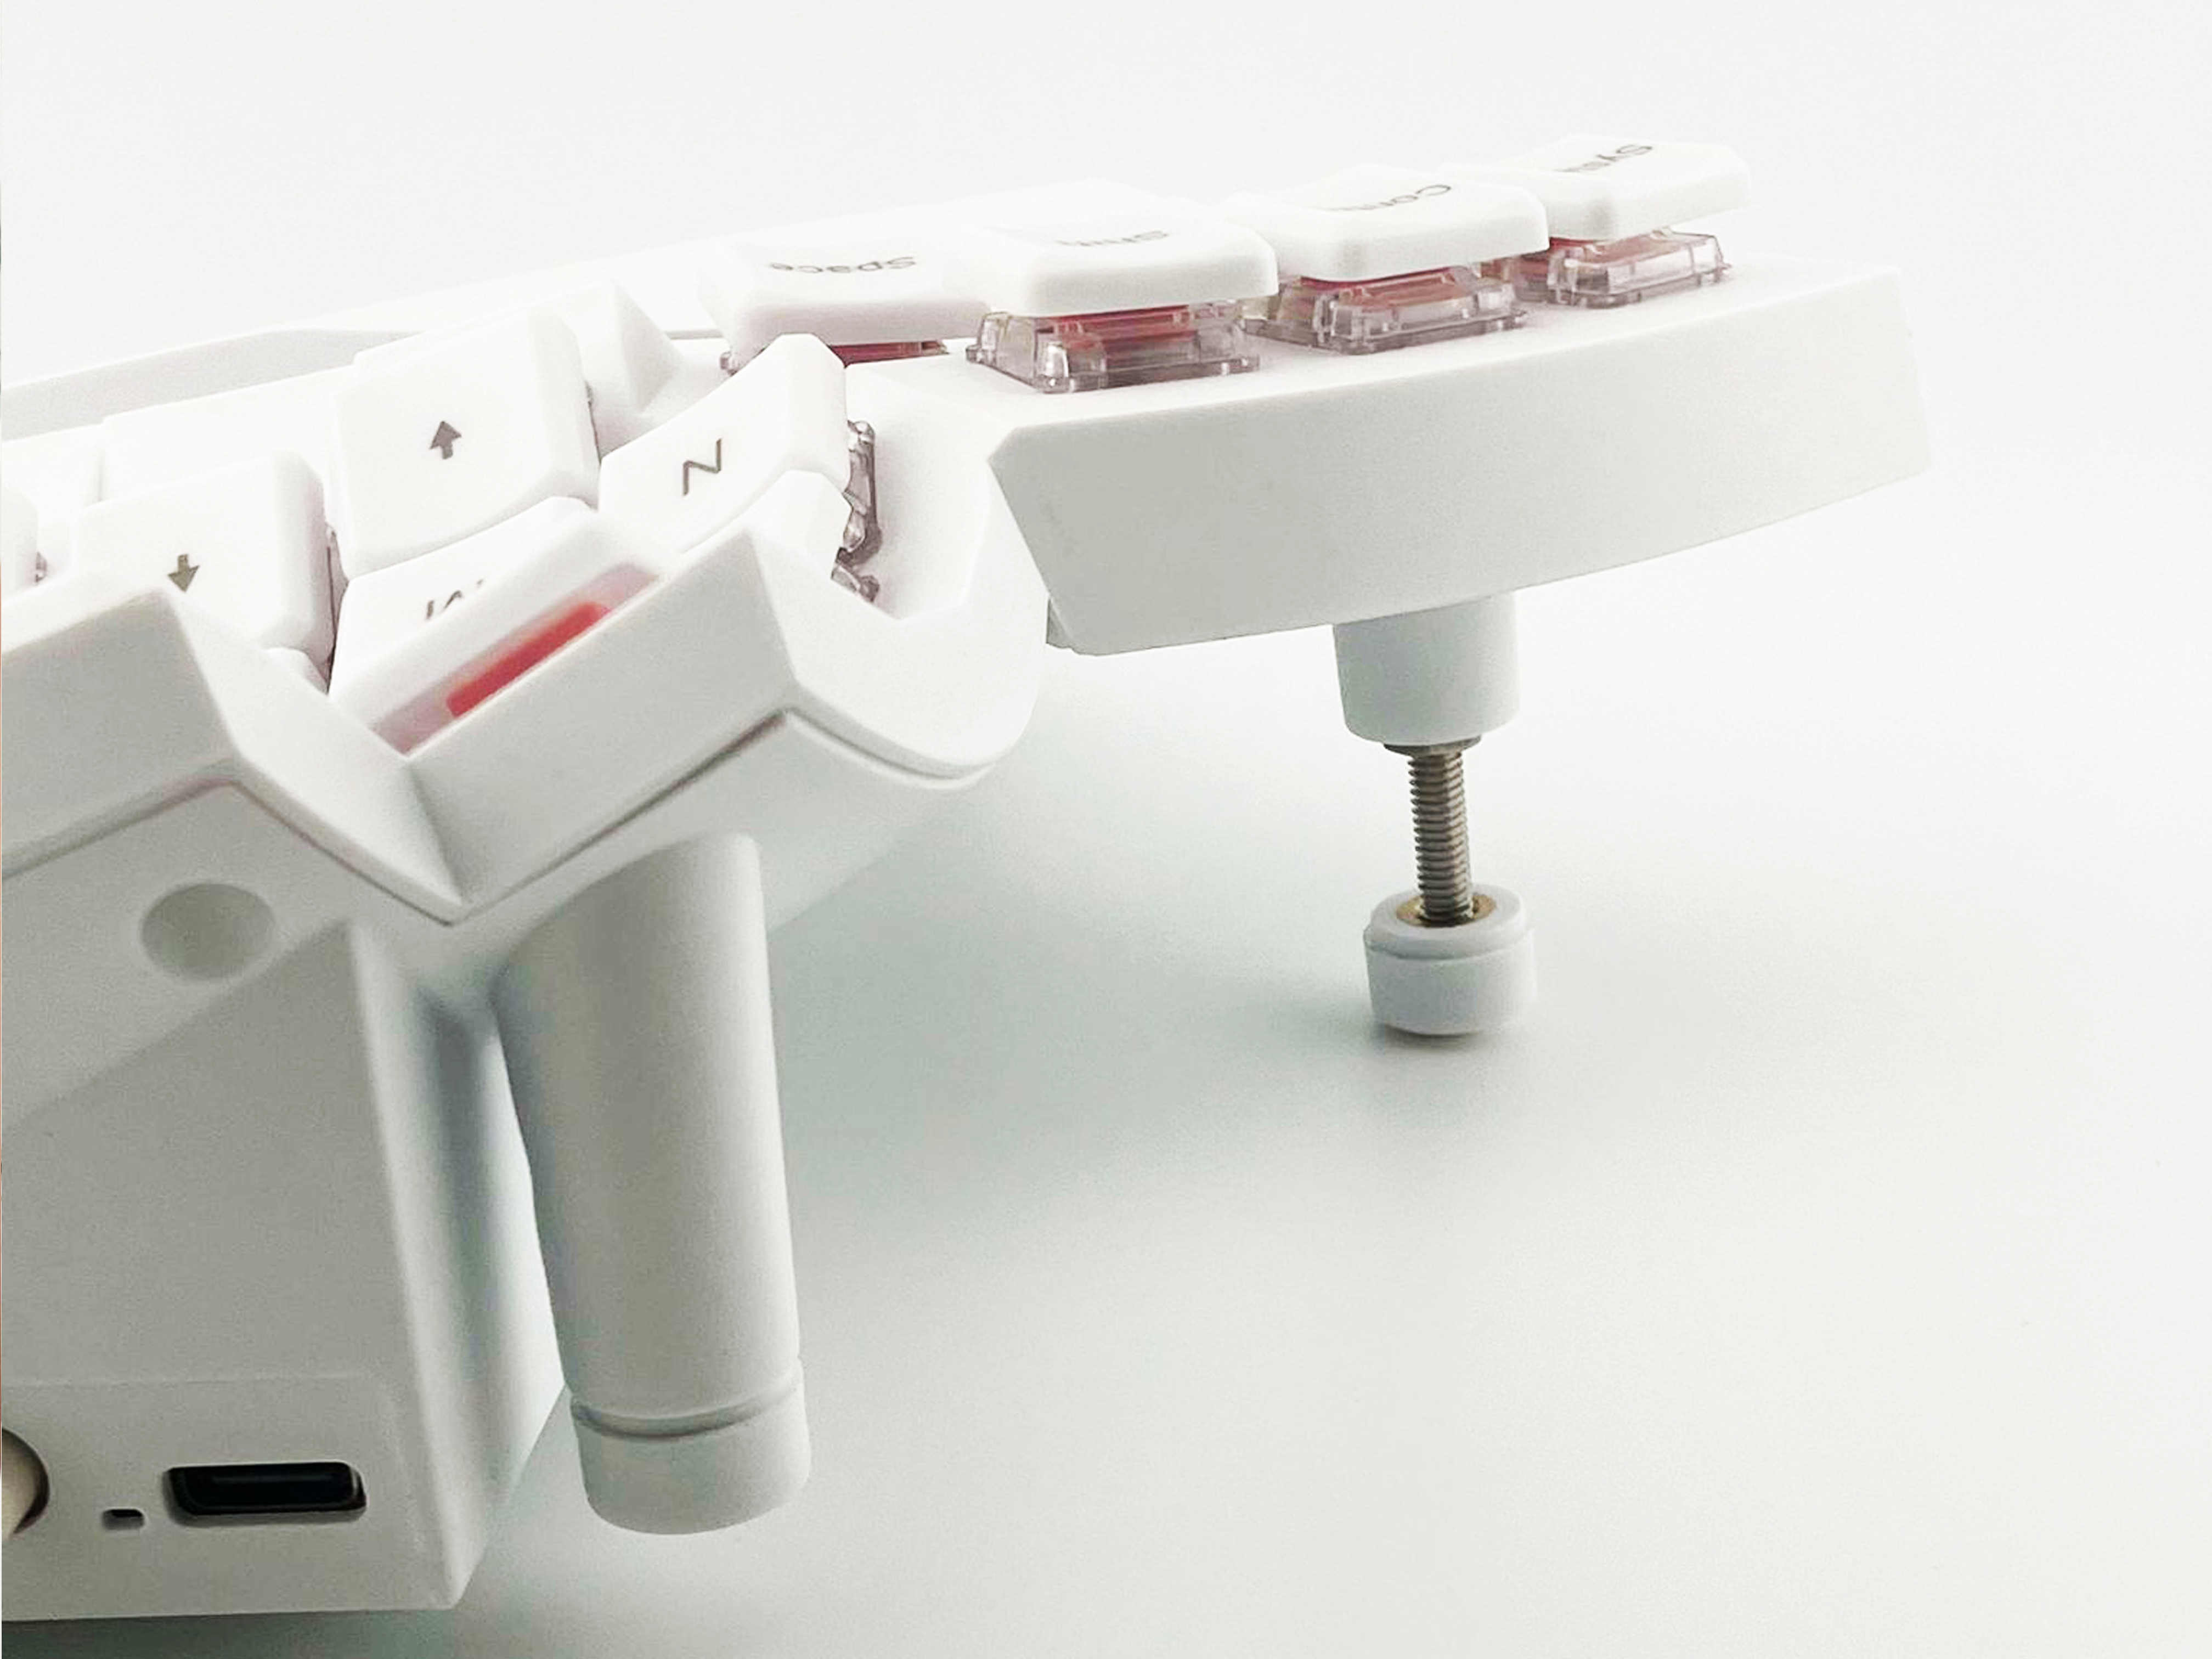
- Secure all adjustable feet using either either the included M4 nuts or silicone O-rings. For the non-extended feet on the outer (pinky finger) side of Glove80, secure them using O-rings as described in Re-leveling the Glove80 without Tenting.
Tip
Securing the feet prevents them from freely spinning or wiggling, which increases stability and and helps prevent the screw thread from moving and losing its positioning over time.
Securing extended legs with M4 nuts:
Once you have selected a tenting angle, you can use the included M4 nuts to firmly secure the extended legs. To secure the legs, add M4 nuts as follows to each leg one at a time, starting with the the thumb cluster leg:
- Remove the foot from the leg by turning the foot counter-clockwise until it comes off completely.
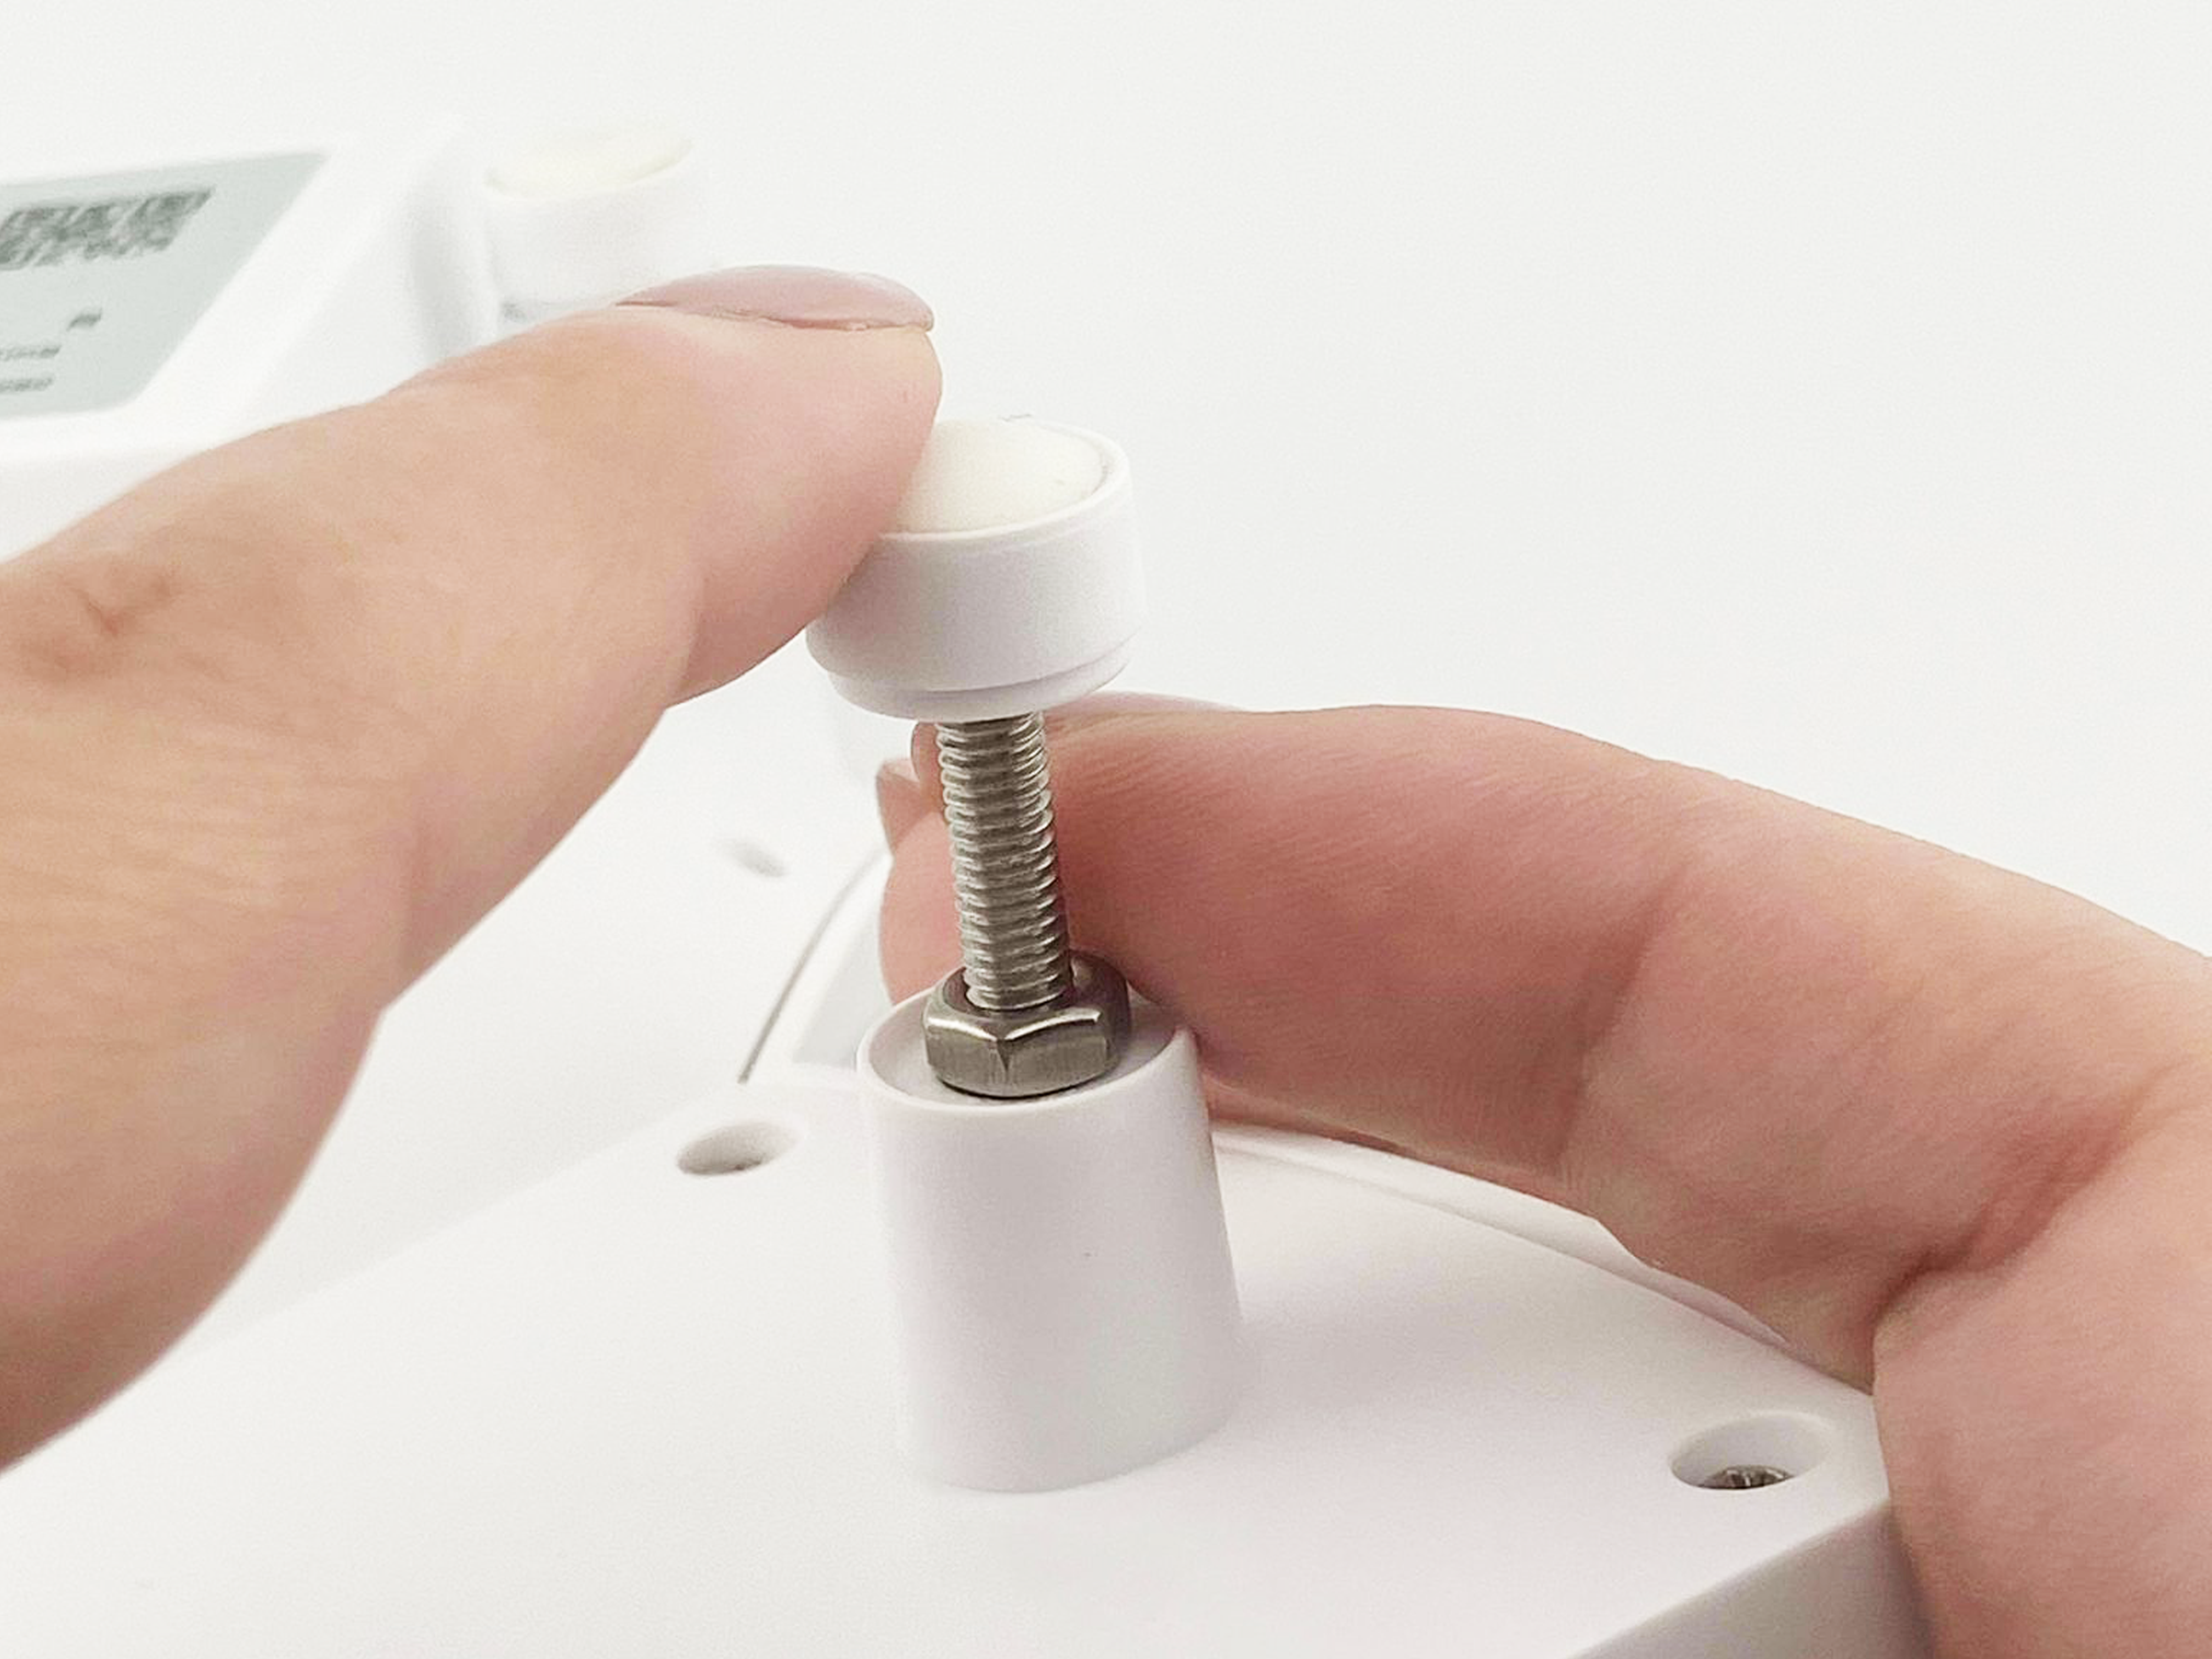
- Put one of the supplied M4 nuts onto the foot’s threaded rod, and turn the nut until it is near the bottom of the threaded rod.
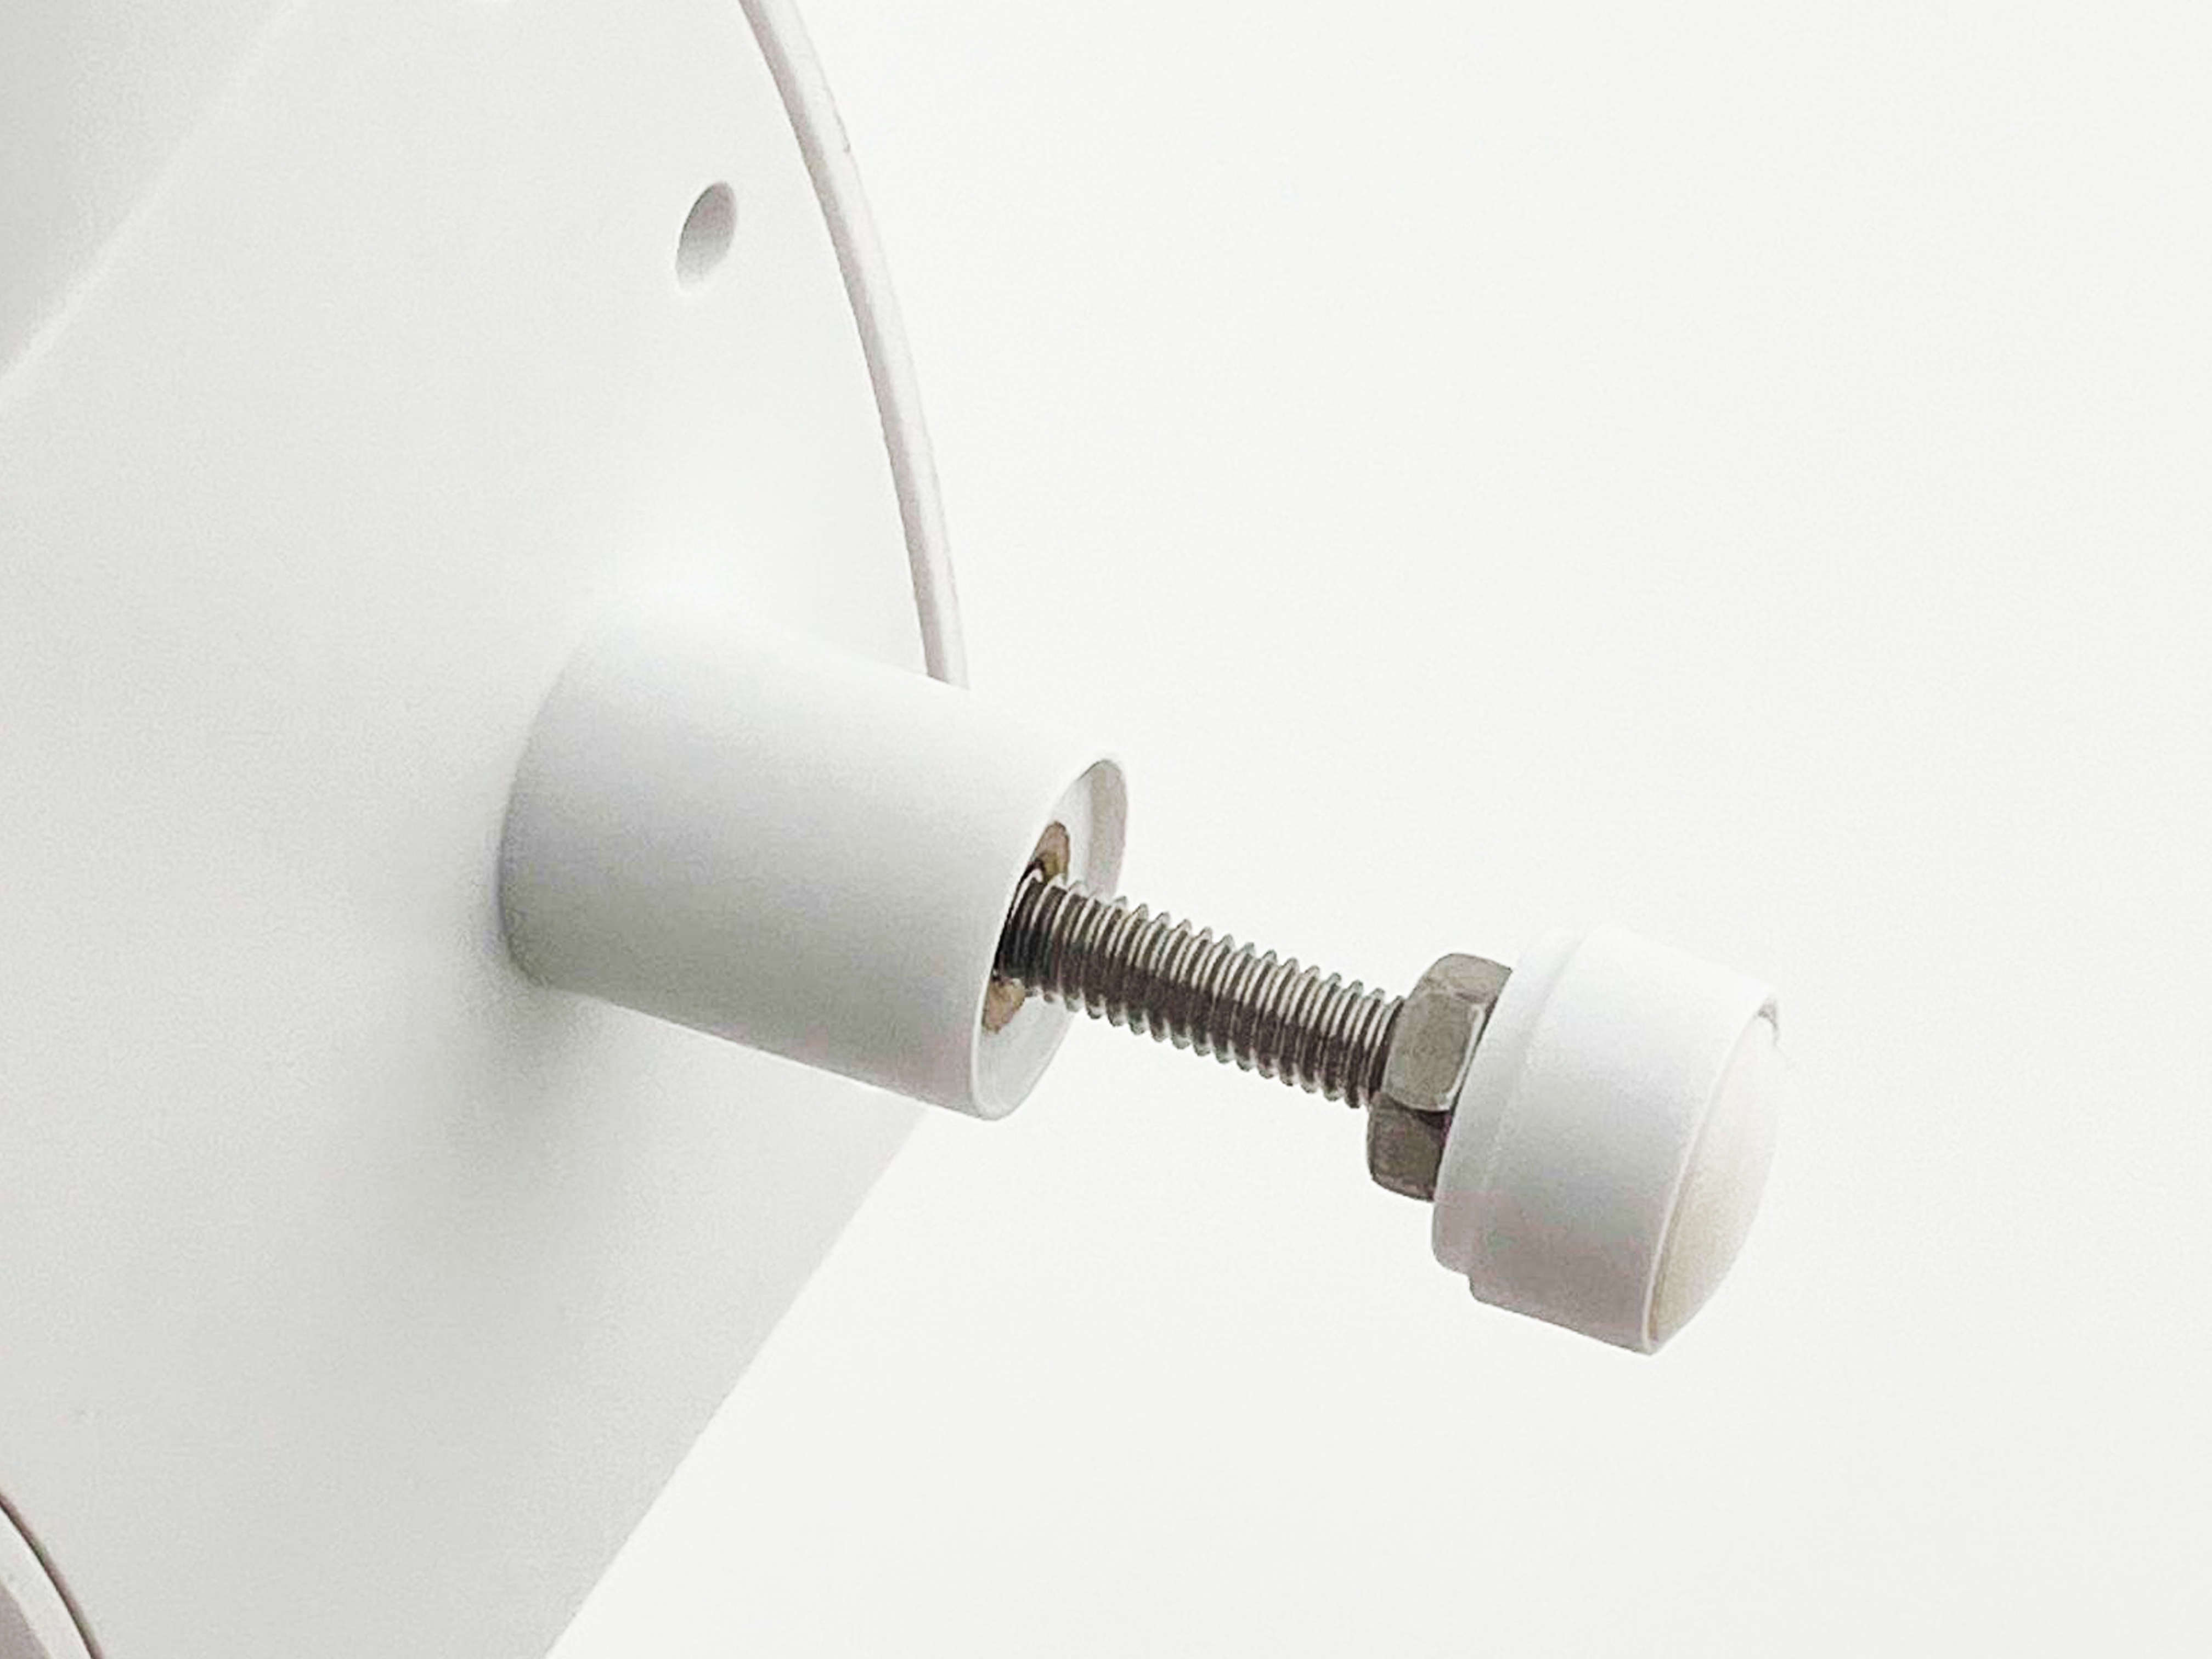
- Screw the foot back into its leg, and adjust it as above until the foot sits level on the desk.
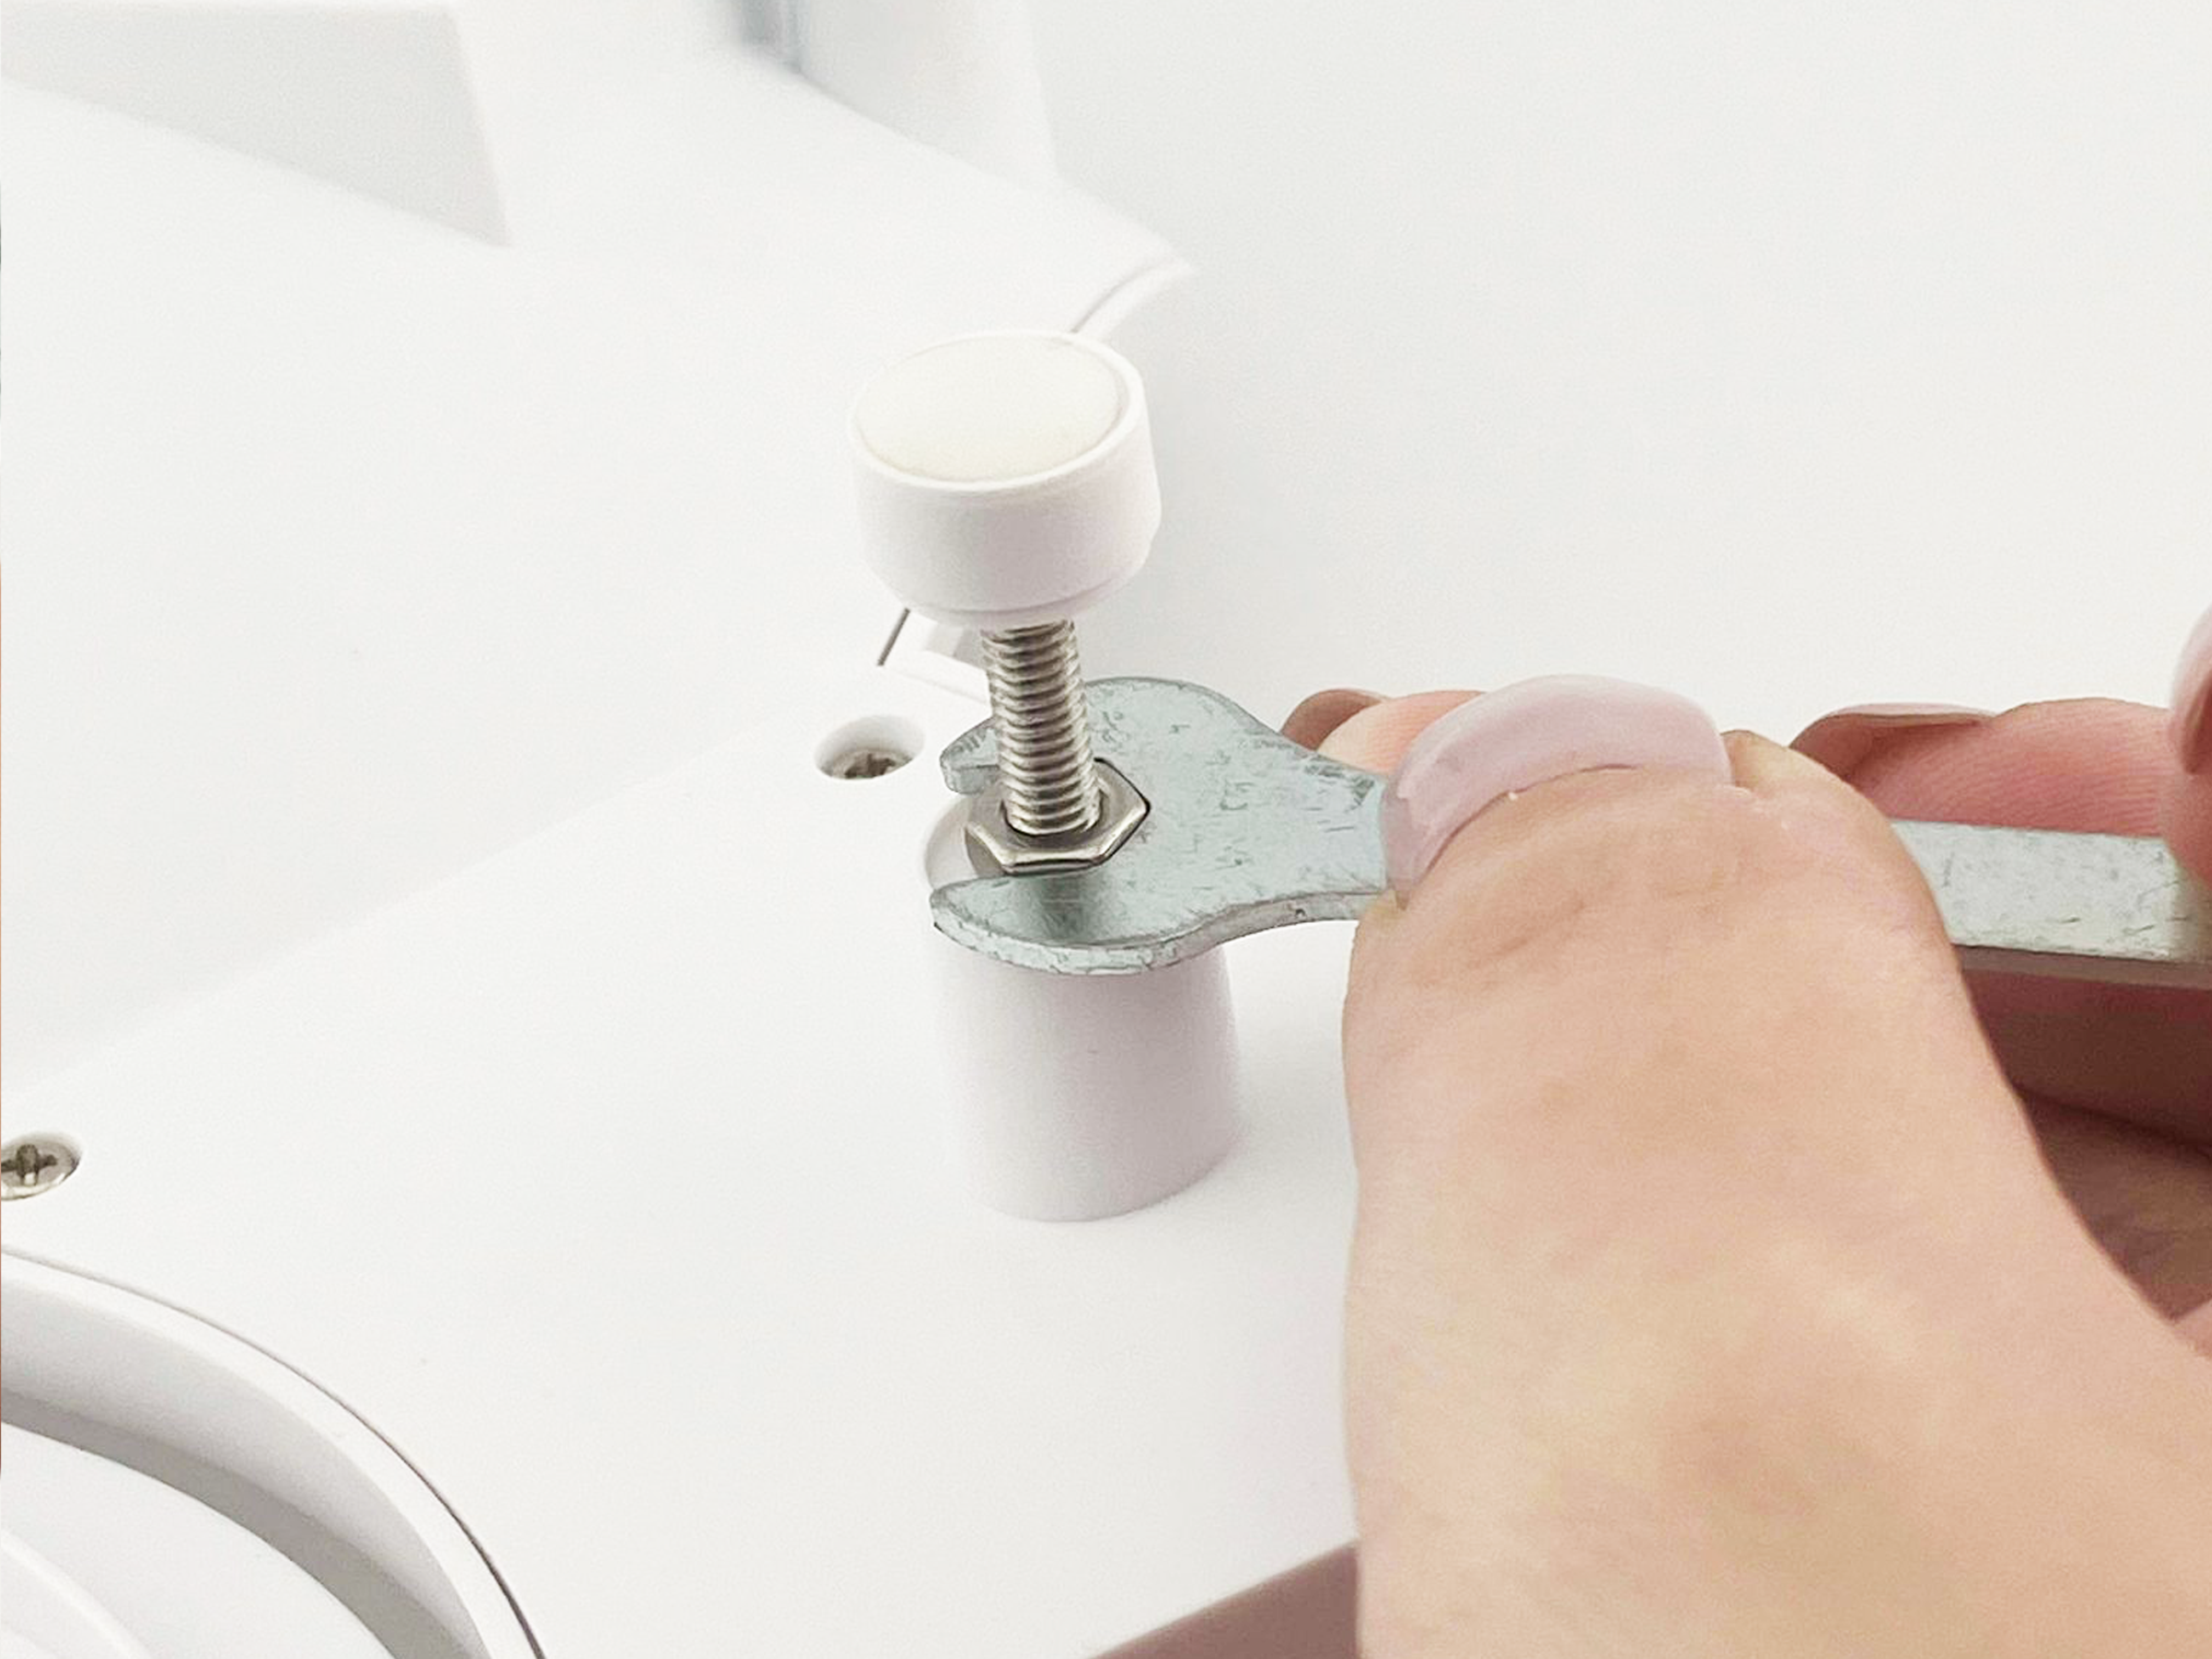
- Turn the M4 nut to move it all the way up the threaded rod until it reaches the plastic case of the keyboard, and then tighten it firmly using the included spanner. With the nut firmly tightened, the foot should now be very hard to turn, and not able to be wiggled in its thread.
Tip
For the leg on the palm rest, using a full-height M4 nut will make it much easier to tighten the nut with the spanner. Use a half-height M4 nut for the other legs.
Securing slightly extended legs with silicone O-rings:
For particularly low tenting angles, the legs may only extend a small amount and the resulting gap may not be large enough to fit a M4 nut. If this is the case, you can instead firmly secure the legs using the included silicone O-rings.
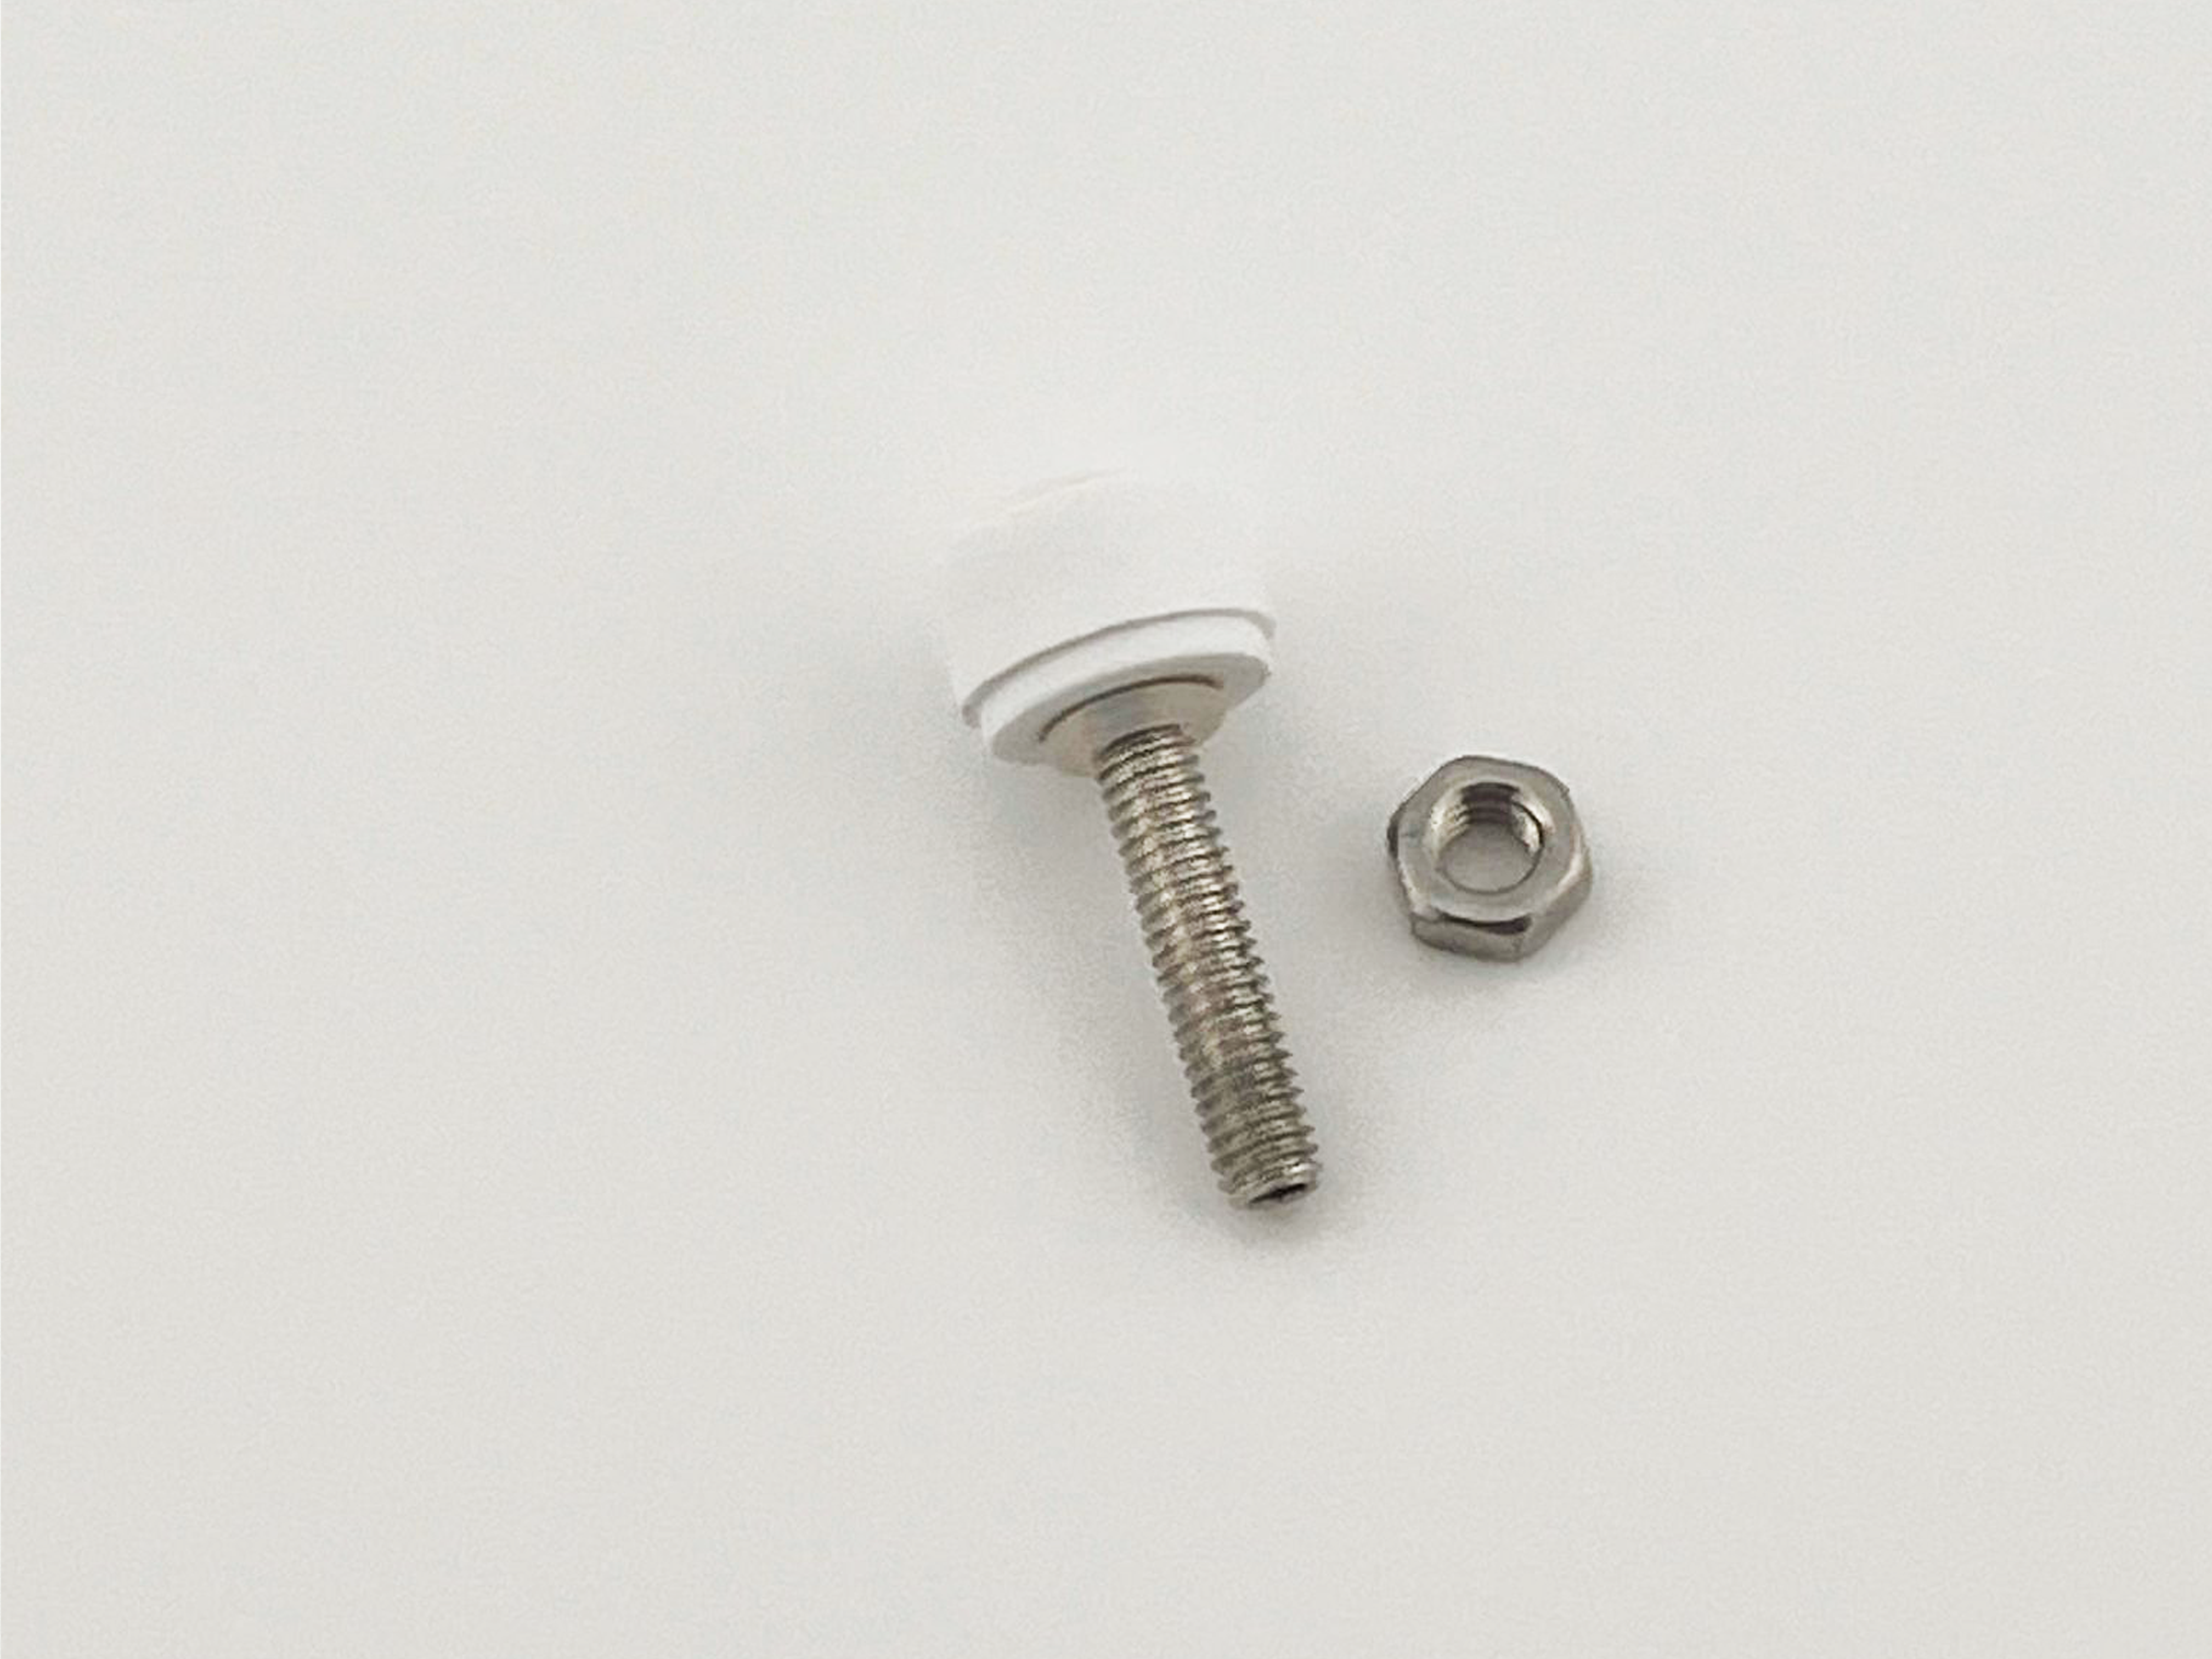
To secure the legs, add O-rings as follows to each leg, one at a time:
- Pick one or more O-rings to match the size of the gap when the foot is adjusted to your preferred tenting angle. You should select O-rings that stack up to slightly thicker than the gap, so that they can be compressed when the foot is tightened.
- Take off the foot by rotating the foot counter-clockwise until it comes off.
- Slip the chosen O-ring(s) onto the foot’s threaded rod.
- Replace the foot, and adjust it until it is once again level on the desk. You should feel the O-ring being compressed and holding the foot firmly in position.
Tip
If you don't feel the O-ring being compressed, the O-ring is too thin: you can use a thicker O-ring or add an additional O-ring. O-rings can become thinner over time as they are compressed: if you find an O-ring has lost its thickness and become loose, you can replace it or add an additional O-ring. Alternatively, if the foot cannot be tightened enough to reach a level position, the O-ring is too thick: you can replace it with a thinner O-ring or remove an O-ring.
For higher angle adjustments (up to roughly 25/30 degrees)
Material needed:
- Foot bases, silicone foot bumpers, threaded rods, half-height M4 nuts, full-height M4 nuts, M4 spanner (included)
Note
Please see Tenting, tilting and custom mounting accessories for a visual guide to the included accessories.
To adjust the tenting angle of one half of the keyboard:
- Remove the original feet from the legs on the inner (thumb cluster) side of Glove80 by turning them counter-clockwise until they come off.
-
For each foot that you removed, construct a longer foot using the components from the accessories kit:
- Take a foot base and attach a silicone foot bumper to its bottom side.
-
Choose a threaded rod of suitable length for the foot that you are replacing, and screw the rod into the foot base, turning it until it touches the underside of the silicone bumper. The thumb cluster foot will need a longer threaded rod than the other two feet.
-
Screw a half-height M4 nut onto the threaded rod and securely tighten it against the foot base. This prevents the foot from freely spinning on the rod and affecting your chosen tenting position.
-
Screw a second M4 nut onto your foot’s threaded rod, and turn the nut until it is near the bottom of the threaded rod.
-
Screw each of your assembled feet into Glove80's legs as far as they will go. Particularly long legs will not be able to retract entirely inside the body of the keyboard.
-
Re-extend the feet by turning them counter-clockwise, until the tenting angle is comfortable for you. Start by extending just the thumb cluster foot to set your chosen tenting angle, then lower the other feet until all the feet are stable on the desk. If the threaded rod isn't long enough to reach your preferred tenting angle, you may need to go back to step 2 and select a different length threaded rod.
-
For each foot, turn the second M4 nut to move it all the way up the threaded rod until it reaches the plastic case of the keyboard, and then tighten it firmly using the included spanner. With the nut firmly tightened, the foot should now be very hard to turn, and not able to be wiggled in its thread.
-
Secure and level the adjustable feet on the outer (pinky finger) side of Glove80 using using O-rings as described in Re-leveling the Glove80 without Tenting.
Tip
- Attach the end of the rod with the hexagonal socket to the foot: this will let you use an Allen key to adjust the foot if it is tight.
- Glove80’s original feet come with the threaded rod attached to the foot base using thread-locking glue (such as Loctite® Blue). Once you are confident in your choice of threaded rod length, you may wish to similarly glue your foot base to your chosen rod.
- For the leg on the palm rest, using a full-height M4 nut will make it much easier to tighten the nut with the spanner. Use a half-height M4 nut for the other legs.
Note
If you prefer an even higher tenting angle than the longest threaded rods can offer, please see the section on Custom Mounting.
Note
If you intend to travel often and remove the feet for transport, the second M4 nut (i.e. the one that is against the body of the keyboard) can be replaced by a M4 Nyloc nut (not included) to make it simple to take the feet on and off. Please see Use of nyloc nut for higher-angle tenting for further details.
Use of nyloc nut for higher-angle tenting
This section describes the optional use of nyloc nuts for higher-angle tenting. Please note that nyloc nuts are not included with Glove80.
To make it easier to install and uninstall long feet from Glove80 without re-adjusting them each time, you can replace the M4 nut that secures the foot to the keyboard base with a M4 nylon-insert lock nut (a.k.a. nyloc nut or DIN985). Nyloc nuts have a ring of nylon inside the nut which firmly holds them to the screw thread, to prevent unintentional turning. This means that once you have positioned it on the threaded rod at your chosen tenting height, it won’t accidentally turn, and you can simply screw the foot into Glove80’s leg until the nut reaches the keyboard case.
A nyloc nut should only be used for the upper part of the rod where it fits into Glove80’s leg. There is no reason to use a nyloc nut for the foot base end of the threaded rod: a standard M4 nut will be sufficient to firmly secure the foot base to the threaded rod.
To install a nyloc nut onto the a foot’s threaded rod, please follow the following steps:
- Mark the position on the threaded rod where you want the nut using a marker or a small piece of tape.
- Remove the foot from the Glove80 leg.
- Hold the nyloc nut firmly with pliers, wrench or a vice.
- Insert a 2mm hex driver or allen key into the hex socket at the end of the threaded rod, and screw the rod into the nyloc nut, until the nyloc nut is at the desired position. The flat side of the nyloc nut should be facing away from the foot base, so that it will be flat against the keyboard.
Tip
You may need to remove the silicone bumper from the foot base to reach the hex socket in the threaded rod.
- Replace the foot into the Glove80 leg, and screw it in until the nyloc nut is firmly against the plastic keyboard case.
Tip
You may need to slightly adjust the nut’s positioning on the rod to re-level the keyboard.